
Bambu Studio is not the most accessible application, but if you have done so far, it should not be completely beyond your understanding. For the first configuration, you choose your printer model (all bamboo models and a healthy selection of third-party printers are officially supported), leave the filament settings as they are, and log in if you want to use the Bambu cloud services. These synchronization printer settings and follow the models you record and download from Makerworld, but a non -cloud mode is available for bambu skeptics and confidentiality.
For any beginner, pretty Many of everything you have to do is connect your printer, open a .3MF or .STL file that you have downloaded from Makerworld or elsewhere, select your filament from the drop -down menu, click “Slice Plate”, then click “Print”. Things like the size of the default nozzle of 0.4 mm and the PEI textured construction plate included by bambu are generally already taken into account, although you may need to check these selections when you open a file for the first time.
When you cut your construction plate for the first time, the application spits a lot of numbers on you. There are two important for 3D printing neophytes to follow. One is the “total filament” figure, which tells you how many grams of filament that the printer will use to make your model (the filament is generally available in 1 kg coils, and the printer will not usually follow for you, so if you want to avoid exhausting yourself in the middle of the work, you may want to keep track of what you use). The second is the “Total Time” figure, which tells you how long the printing will take the first staircase stages until the end of the work.
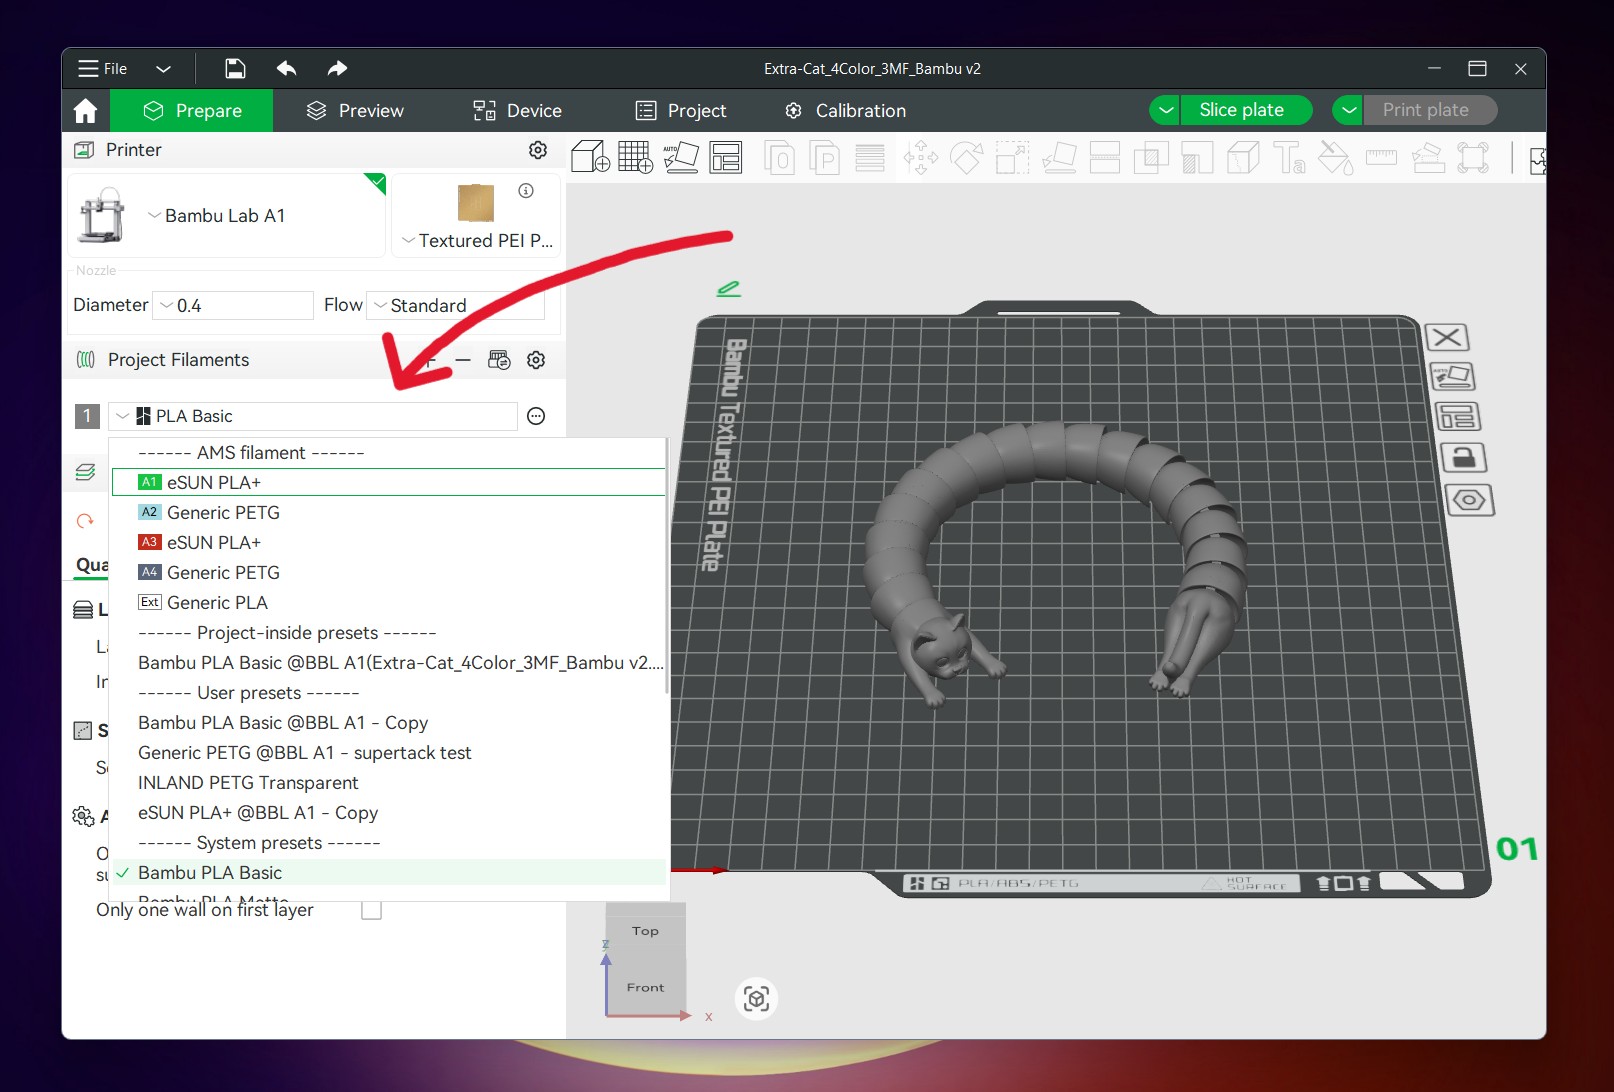
Selection of your filament and / or temperature presets. If you have the automatic material system (AMS), this is also where you manage multicolored printing.
Andrew Cunningham
Selection of your filament and / or temperature presets. If you have the automatic material system (AMS), this is also where you manage multicolored printing.
Andrew Cunningham
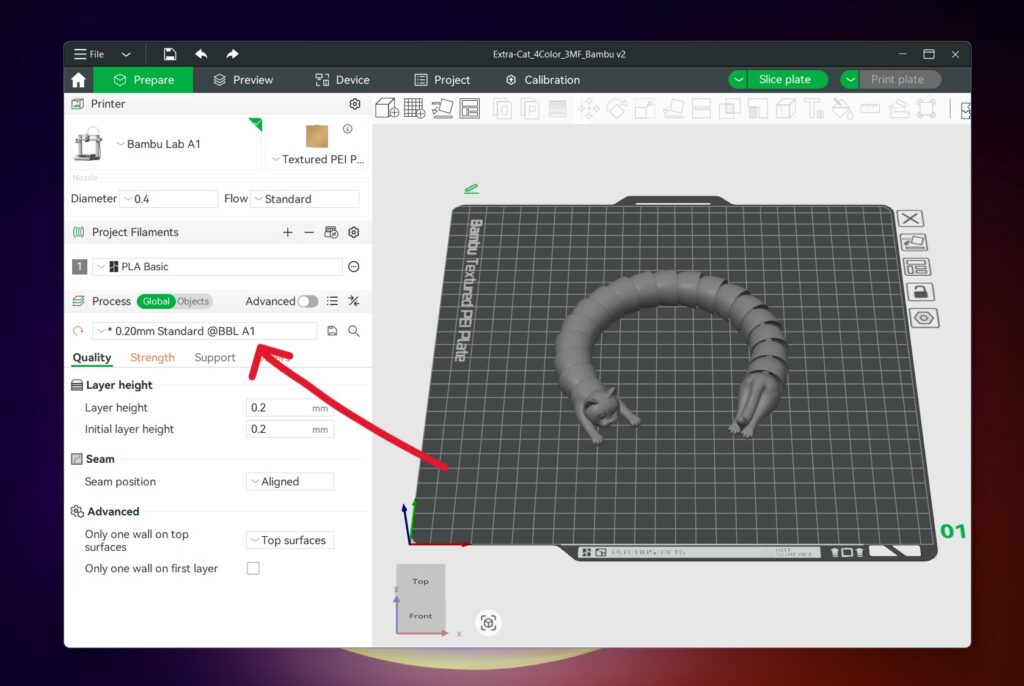
The main way to modify the print quality is to adjust the height of the layers that the A1 poses.
Andrew Cunningham
The main way to modify the print quality is to adjust the height of the layers that the A1 poses.
Andrew Cunningham
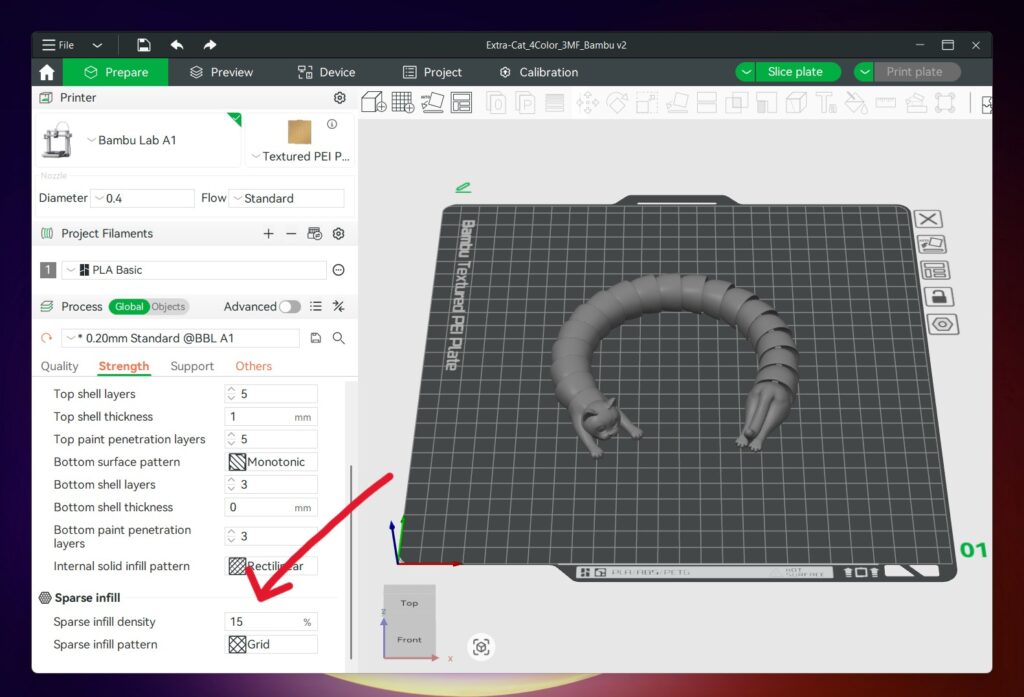
The addition of an additional filling can add a certain resistance to prints, although 15% generally gives a decent amount of resistance without too much use of the filament.
Andrew Cunningham
The addition of an additional filling can add a certain resistance to prints, although 15% generally gives a decent amount of resistance without too much use of the filament.
Andrew Cunningham
The main way to modify the print quality is to adjust the height of the layers that the A1 poses.
Andrew Cunningham
The addition of an additional filling can add a certain resistance to prints, although 15% generally gives a decent amount of resistance without too much use of the filament.
Andrew Cunningham
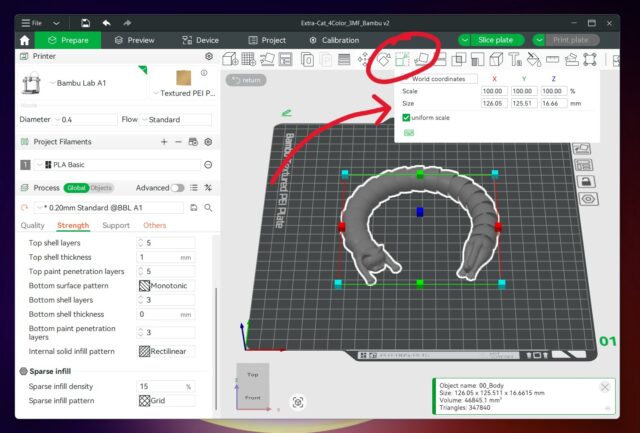
For some impressions, extending them a little up or down can make them better to your needs.
Andrew Cunningham
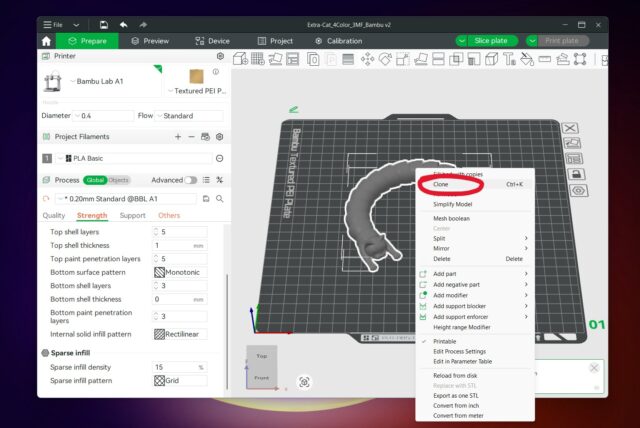
For small elements, you can print a few at a time using the clone function. For filaments with a gradient, this also makes the gradient effect more pronounced.
Andrew Cunningham
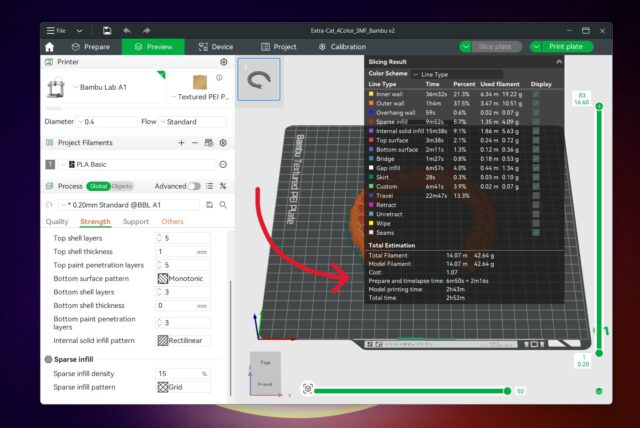
Bambu Studio estimates the amount of filament you use and the time that an impression will take. The filament is generally available in 1 kg coils.
Andrew Cunningham
When selecting filament, people who stick to bambu first coils will have the simplest period, because the optimal parameters are already programmed in the application. But I had almost no problem with the “generic” presets and the generic filament reels of the interior brand that I bought from our local micro-center, at least when it holds you to PLA (polylactic acid, the most common and generally the simplest to print of the different types of filament that you can buy). But we will dive deeper into plastics in part 2 of this series.
